Some links in my articles are affiliate links. I may earn a commission when you buy through them.
Plan your headtorch around the time you could still be out in darkness, including stops and a slower finish. Then check how long it provides a useful beam at the setting you need. The longest advertised runtime may describe a low mode that is quite different from the light you want on uneven ground.
For a remote or overnight route, start with the organiser’s lighting and backup requirements. The best running headtorches guide compares everyday options; check model-specific performance for the longer dark section you are planning.
Look at brightness and runtime for the same mode. The current Lepro listing separates high and low spot settings: it quotes six hours for high and nineteen for low. Those are the supplier’s figures; for your run, use the figure beside the brightness you’ll actually need.
Also look for how output changes. In its energy-management explanation, Petzl distinguishes a light that gradually dims from one that holds a regulated output before dropping to reserve. A lamp still glowing at the end of a stated duration may have a very different beam from the one it produced at the start.
Check whether the maker provides an output curve, a sustained-output duration or a separate reserve-lighting figure. Do not count reserve hours as normal running hours without evidence that the remaining beam suits your route. Look up your exact model; do not assume that every rechargeable torch holds its initial brightness.
Allow for stops and a slower finish
Begin with when you will need the light and when you expect to reach a reliably lit finish or other safe stopping point. Include an early start before dawn, shaded woodland before sunset and any walk back to transport. The race clock may finish before your need for light does.
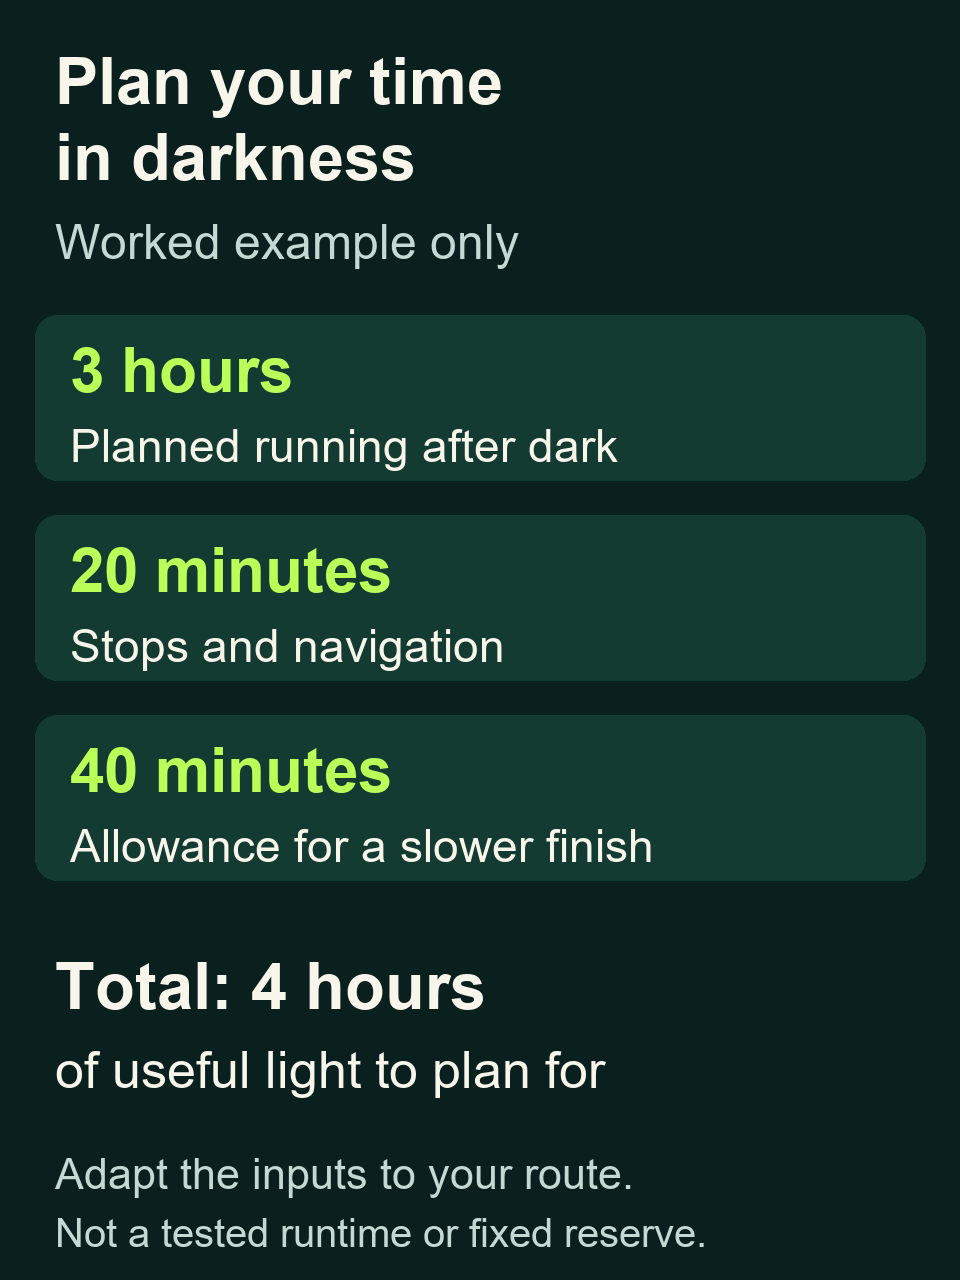
As a worked example, suppose you expect three hours of running after dark. Add twenty minutes for stops and navigation, then forty minutes for a slower finish: that gives four hours to plan for. That’s an example, so adjust the allowances for your terrain, weather, pace and available ways off the route.
Use the slower finish estimate when checking how long the torch needs to last. If the margin depends on never stopping or never slowing down, revise the setup before committing to that route. A longer remote outing may need a different primary lamp as well as backup power.
Find out when the beam stops being useful
Start with the lamp fully charged, or with a fresh compatible battery set, and note the setting. On a familiar route with an easy exit, learn what level lets you see the surface and turnings comfortably. Carry suitable backup light and stop the check if the beam becomes inadequate.
Keep a short note of the start time, any mode changes, the first low-power indication and when you stop finding the beam useful. Follow the maker’s operating instructions for any longer check at home. Repeat the check when you change the approved battery type, usual setting or other conditions that affect your setup.
Use the headwear, angle and pace you expect on the outing. A broad beam may show the near surface comfortably, while a more focused beam helps pick out a turn ahead. Petzl’s brightness and burn-time guidance explains why beam shape changes reach even at the same light output. Avoid choosing on lumens alone.
The long-press dimmer on the Blukar rechargeable two-pack is handy where a familiar route moves between lit streets and darker paths. Note those brightness changes too when you check how long it lasts.
Make the power change part of the plan
Decide where you will change batteries, swap lights or recharge. Use the last convenient sheltered stop before power becomes uncertain, rather than aiming to exhaust the lamp exactly at a checkpoint. Check what power access an event actually provides before building a charging stop into your plan.
Carry the exact cells or charging lead the lamp needs and protect them from wet kit. A bank packed for your phone is useful only if the connection and charging conditions also suit the torch. Read the power-bank packing guide for connector space and the rechargeable-versus-battery comparison for the complete carried setup.
Rehearse finding the backup with gloves on, switching it on and putting the main light away. Keep enough usable light available while you deal with the change. A phone’s remaining charge may already be needed for navigation and contact, so plan the running-light backup separately.
Check the event before finalising the kit
Read the current edition’s kit instructions for the required lighting, spare energy and backup light. Check any minimum specification directly with the organiser.
If you are choosing a longer outing, the Race Atlas lets you explore UK events by date, distance and terrain, then follow the organiser’s current information. Add the main light, your actual spare arrangement and required leads to the Race Day Pack Planner once you have settled the route and timing.